Note: This blog entry is an update of a previous article written about how to install the Jaxon DbAdmin package on Voyager.
Meanwhile, the development of Voyager was discontinued, so we decided to move to another admin panel.
This article describes the installation on Backpack, a Laravel-based admin panel.
The two most popular PHP web applications for database administration are phpMyAdmin and Adminer. Both are standalone applications that need to be installed on a web server.
The Jaxon library offers another choice, Jaxon DbAdmin, which inserts a database administration tool into a page of an existing PHP web application.
What is Adminer
Adminer (formerly phpMinAdmin) is a full-featured database management tool written in PHP. Unlike phpMyAdmin, it consist of a single file ready to deploy to the target server. Adminer is available for MySQL, MariaDB, PostgreSQL, SQLite, MS SQL, Oracle, Elasticsearch, MongoDB and others via plugin.
What is Jaxon DbAdmin
Jaxon DbAdmin results from the fork and redesign of the Adminer core features into several Composer packages, and the integration of the Jaxon library.
Unlike Adminer which is a standalone application, Jaxon DbAdmin is a Jaxon package, which allows the user to integrate the database management features into an existing PHP application. Jaxon DbAdmin is therefore available in a page of the application, whose content is updated with ajax requests generated by Jaxon.
As an additional consequence, the authentication and security features are not implemented in the package, which will then rely on those provided by the application it is installed on.
Note Jaxon DbAdmin is still a work in progress, and is not yet ready for production.
What is Backpack
Backpack is a flexible admin panel for Laravel, that exists since 2016. Because it keeps things simple, it is widely regarded as being both easy to learn and easy to customize.
In addition to Laravel, it is built on the Bootstrap 5 CSS framework, which is supported by the UI library used by Jaxon DbAdmin.
Install Laravel and Backpack
Althougth this article describes the installation of Jaxon DbAdmin on Backpack, the main steps are the same for the installation on others environments.
- Install the Jaxon packages,
- Create the page that will display the
Jaxon DbAdmindashboard, - Add a route and a menu entry for this page,
- Configure
Jaxonand its packages, among whichJaxon DbAdmin.
First, we will install Backpack on the version 12 of Laravel, following its documentation.
composer create-project laravel/laravel backpack 12.x
cd backpack
composer require backpack/crud
After we have defined the database access parameters in the .env file, we can take the final step of the installation and create an admin account.
php artisan backpack:installThis command will ask for information to create an admin account, and also to choose a theme. We have chosen Tabler, a Bootstrap 5 template.
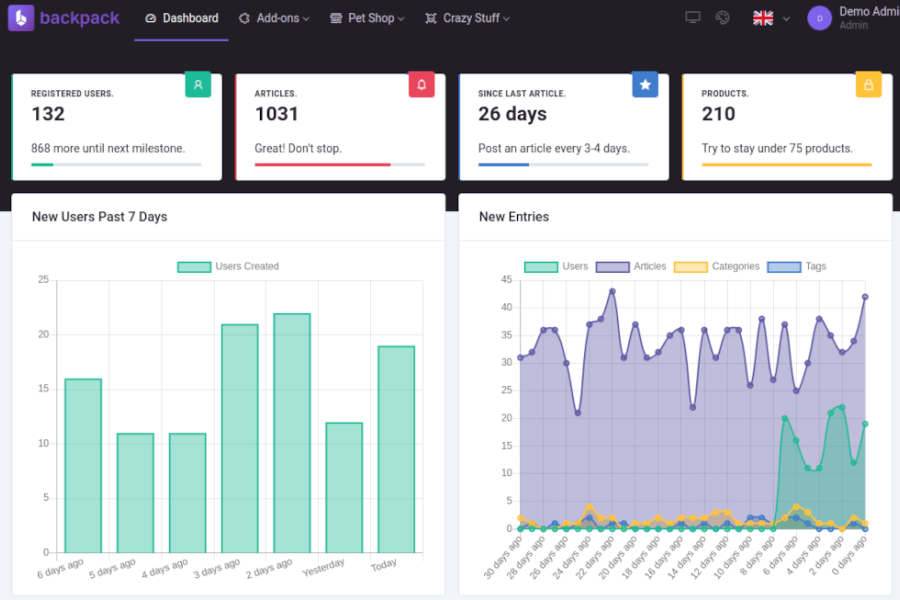
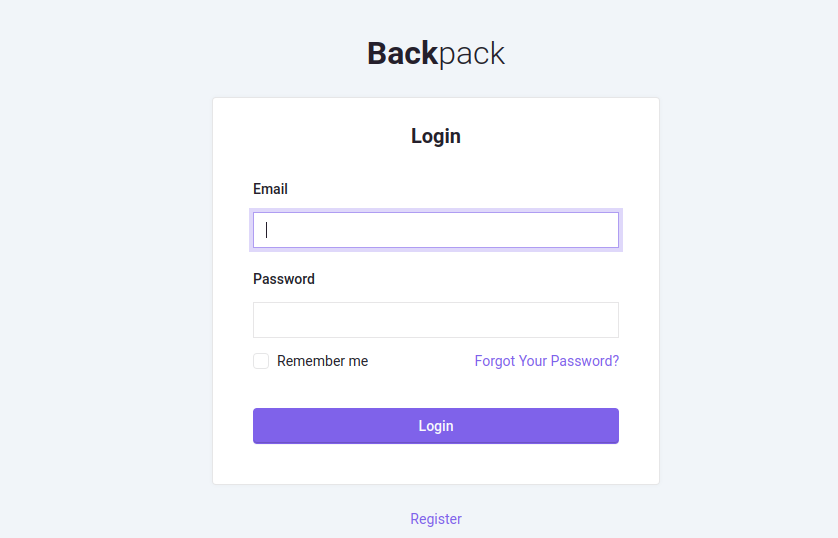
After the command has completed, we can login on Backpack, on the /admin path in the installed application.
Install the Jaxon packages
In addition to the lagdo/jaxon-dbadmin package, we need to install the jaxon-php/jaxon-laravel package, for integration with Laravel, the framework Backpack is built with.
For the database drivers, we need to install the lagdo/dbadmin-driver-mysql, lagdo/dbadmin-driver-pgsql or lagdo/dbadmin-driver-sqlite packages, depending on the databases that need to be managed.
Finally, we need to install packages for the UI. At the time this article is published, only the package for Bootstrap is available.
Note Some of the packages to be installed are still being actively developed. So we need to set the
minimum-stabilityvalue todevin thecomposer.jsonfile, and install those packages from thedev-mainbranch.
composer require jaxon-php/jaxon-laravel jaxon-php/jaxon-dialogs jaxon-php/jaxon-upload
composer require lagdo/jaxon-dbadmin:dev-main lagdo/dbadmin-driver-mysql:dev-main lagdo/dbadmin-driver-pgsql:dev-main lagdo/dbadmin-driver-sqlite:dev-main
composer require lagdo/ui-builder-bootstrap5:dev-main
The php artisan route:list | grep jaxon command now prints the following line, showing that a route exists for Jaxon requests.
Thanks to the Laravel package discovery feature.
POST jaxon ... (more dots) ... jaxon.ajaxCreate a page for Jaxon DbAdmin
We are now going to add a route and a view that will display the Jaxon DbAdmin page.
The Backpack admin panel really makes those tasks very easy.
The resources/views/admin/dbadmin.blade.php view extends the blank template, and inserts the HTML, CSS and javascript codes of Jaxon DbAdmin in the page.
The Font Awesome icon set is also added, because it is used in the Jaxon DbAdmin UI.
@extends(backpack_view('blank'))

@push('after_styles')
    <link rel="stylesheet" href="//use.fontawesome.com/releases/v5.15.4/css/all.css">

    @jxnCss
@endpush

@push('after_scripts')
    @jxnJs

    @jxnScript
@endpush

@section('content')
<div style="margin:0 -10px; padding:5px; background-color:white; border-radius:5px;">
    <div style="margin-left:5px">
        <h2>Jaxon DB Admin</h2>
    </div>
    <div>
        @jxnPackage(Lagdo\DbAdmin\Package::class)
    </div>
</div>
@endsection
The route is added in the routes/backpack/custom.php file, where custom routes are defined.
Route::group([
    'prefix' => config('backpack.base.route_prefix', 'admin'),
    'middleware' => array_merge(
        (array) config('backpack.base.web_middleware', 'web'),
        (array) config('backpack.base.middleware_key', 'admin')
    ),
    'namespace' => 'App\Http\Controllers\Admin',
], function () { // custom admin routes
    // Jaxon DbAdmin route
    Route::get('dbadmin', fn() => view('admin.dbadmin'))
        ->middleware('jaxon.config')
        ->name('dbadmin');
}); // this should be the absolute last line of this file
The route displays the view, after having called a middleware to setup the Jaxon library.
Now we can create a menu entry for Jaxon DbAdmin, by adding the following content in the resources/views/vendor/backpack/ui/inc/menu_items.blade.php file.
<li class="nav-item">
    <a class="nav-link" href="{{ backpack_url('dbadmin') }}">
        <i class="la la-database nav-icon"></i> DB Admin
    </a>
</li>
Jaxon configuration
The last step is to define the Jaxon library config in the config\jaxon.php file.
This also includes the Jaxon DbAdmin package config, where the database servers to be managed are defined.
return [
    'app' => [
        'request' => [
            'route' => 'jaxon.ajax', // The route name
            'middlewares' => ['web', 'auth'],
        ],
        'directories' => [],
        'packages' => [
            Lagdo\DbAdmin\Package::class => [
                // The database servers
                'servers' => [
                    'db-postgresql' => [ // A unique identifier for this server
                        'driver' => 'pgsql',
                        'name' => 'PostgreSQL 14',     // The name to be displayed in the dashboard UI.
                        'host' => 'db-postgresql',     // The database host name or address.
                        'port' => 5432,      // The database port. Optional.
                        'username' => '********', // The database user credentials.
                        'password' => '********', // The database user credentials.
                    ],
                    'db-mariadb' => [ // A unique identifier for this server
                        'driver' => 'mysql',
                        'name' => 'MariaDB 10',     // The name to be displayed in the dashboard UI.
                        'host' => 'db-mariadb',     // The database host name or address.
                        'port' => 3306,      // The database port. Optional.
                        'username' => '********', // The database user credentials.
                        'password' => '********', // The database user credentials.
                    ],
                    'db-mysql' => [ // A unique identifier for this server
                        'driver' => 'mysql',
                        'name' => 'MySQL 8',     // The name to be displayed in the dashboard UI.
                        'host' => 'db-mysql',     // The database host name or address.
                        'port' => 3306,      // The database port. Optional.
                        'username' => '********', // The database user credentials.
                        'password' => '********', // The database user credentials.
                    ],
                    'sqlite-3' => [ // A unique identifier for this server/var/www
                        'driver' => 'sqlite',
                        'name' => 'Sqlite 3',     // The name to be displayed in the dashboard UI.
                        'directory' => '/var/lib/sqlite/3', // The directory containing the database files.
                    ],
                ],
            ],
        ],
        'ui' => [
            'template' => 'bootstrap5',
        ],
        'dialogs' => [
            'default' => [
                'modal' => 'bootbox',
                'alert' => 'toastr',
                'confirm' => 'noty',
            ],
        ],
    ],
    'lib' => [
        'core' => [
            'language' => 'en',
            'encoding' => 'UTF-8',
            'prefix' => [
                'class' => '',
            ],
            'request' => [
                'csrf_meta' => 'csrf-token',
                'uri' => '/jaxon', // The route url
            ],
            'debug' => [
                'on' => false,
                'verbose' => false,
            ],
            'error' => [
                'handle' => false,
            ],
        ],
        'js' => [
            'lib' => [
                // 'uri' => '',
            ],
            'app' => [
                // 'uri' => '',
                // 'dir' => '',
                // 'export' => true,
                // 'minify' => true,
            ],
        ],
    ],
];
The lib.core.request.csrf_meta option adds Laravel CSRF protection on Jaxon requests.
The app.ui.template defines the UI library to use, here bootstrap5.
The app.dialogs section defines the libraries to use for dialogs.
The servers option in the app.packages.Lagdo\DbAdmin\Package section defines the list of servers to be managed.
The Jaxon request route access is also protected with the Laravel auth middleware.
Note The database credentials can be moved to the .env file.
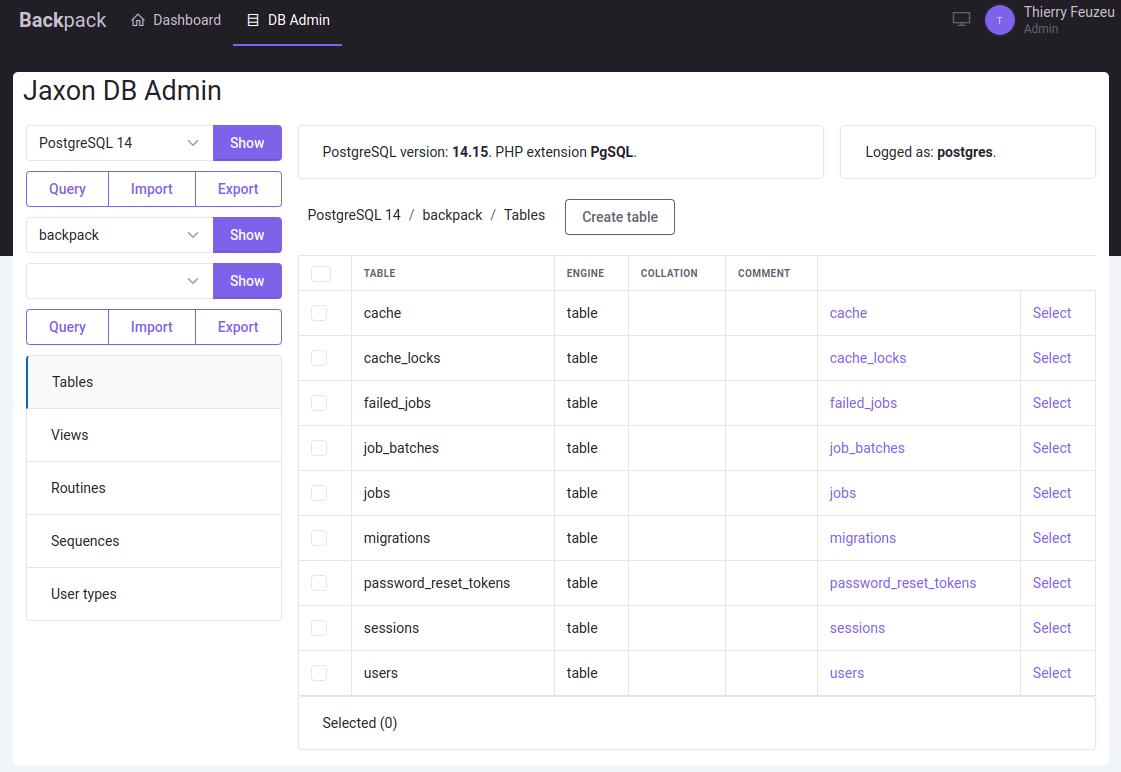
The installation of Jaxon DbAdmin on Backpack has now been completed.
The above image shows how the page is displayed to the user.
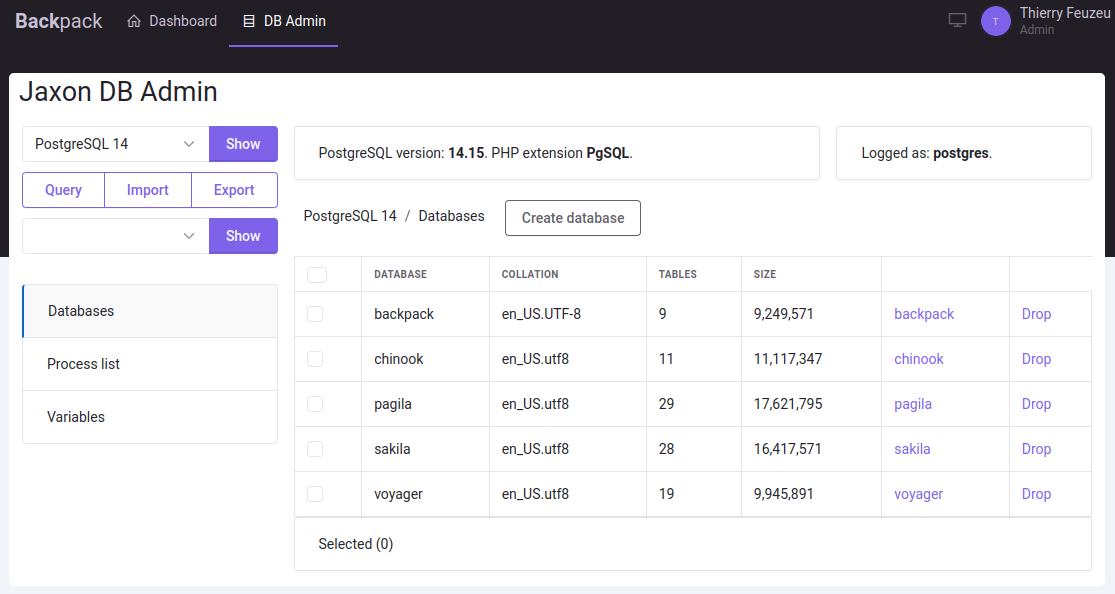
The user can for example browse the content of the Backpack database.